This is an easy way to create the Café Wall illusion with PowerPoint. It takes about two minute.
How to make the Café Wall illusion (video)
This is a video of how to make it. If you are watching from a PC, you can change the playback speed by clicking on the “︙” button at the bottom right of the video.
How to make the café wall illusion (PowerPoint)
- Select “Shape” > “Basic Shape” > “Square/Rectangle”.
- While holding down the Shift key, drag the mouse to enlarge the aspect ratio to 1:1 and draw a square (I recommend drawing a larger size of about 3cm x 3cm).
- Select a shape and set “Fill Shape” to “Black” and “Border Shape” to “No Border”.
- Select the shape and press ⌘ (Ctrl for Windows) and D to duplicate it.
- Place the left side of the cloned figure exactly on the right side of the original figure (it’s easier to follow the guide lines).
- Set the “Fill Shape” of the “Duplicate Diagram” to “White”.
- Select all the figures and duplicate them by pressing ⌘ (Ctrl key in Windows) and D. While they are still selected, place the left side of the “duplicated figure” exactly on the right side of the “original figure”. You can repeat this process as many times as you like.
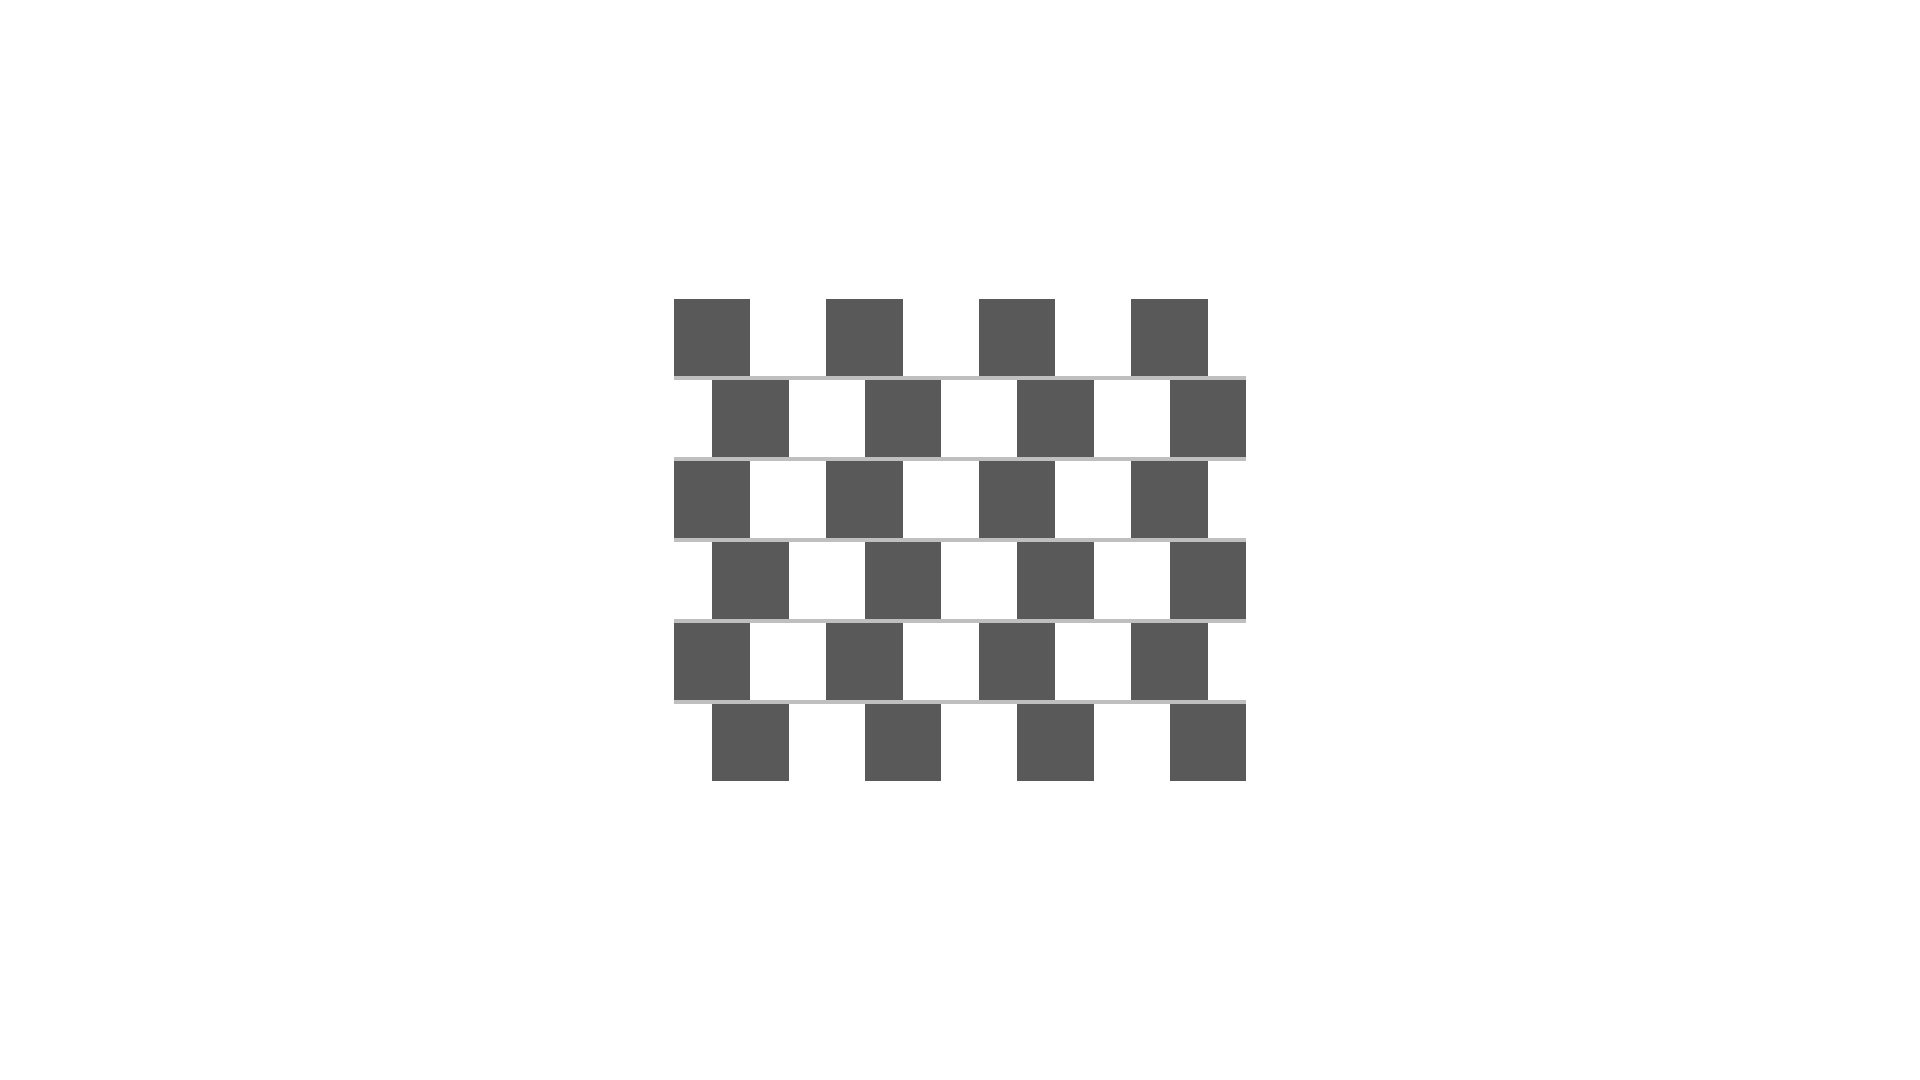
- Select the rightmost (or leftmost) square and make it narrower (about 1/3).
- Select all the shapes, group them, and duplicate them by pressing ⌘ (Ctrl for Windows) and D.
- Select the duplicated figure and flip it left or right under Rotate.
- Select all the shapes and duplicate them by pressing ⌘ (Ctrl key for Windows) and D.
- Select all shapes and group them together by going to Align and then Center Left/Right and Align Top/Bottom.
- Make sure that there is a gap between the shapes. If there is no gap, adjust the position of the bottom shape by moving it further or deleting part of it and then “Align Top to Bottom”.
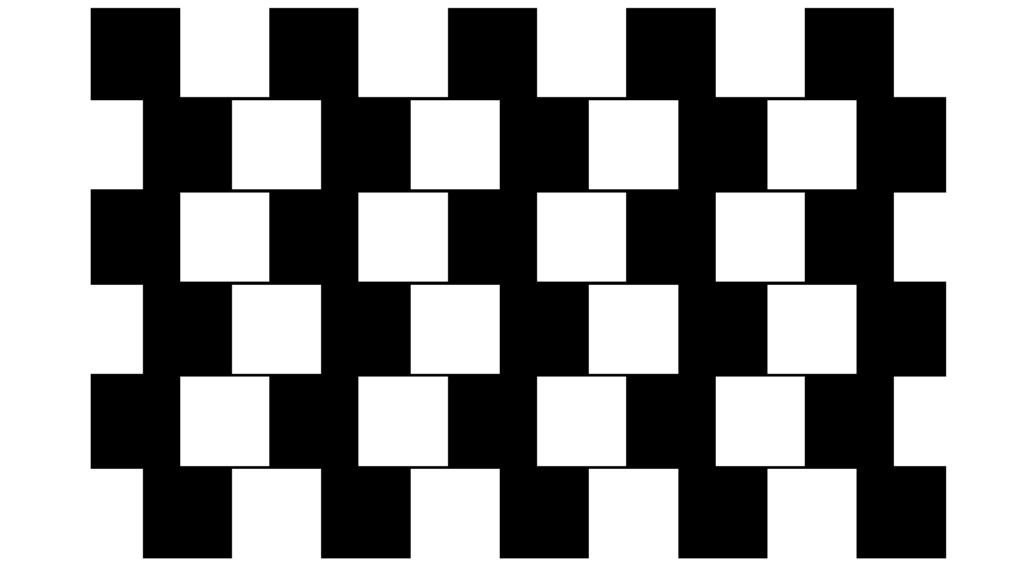
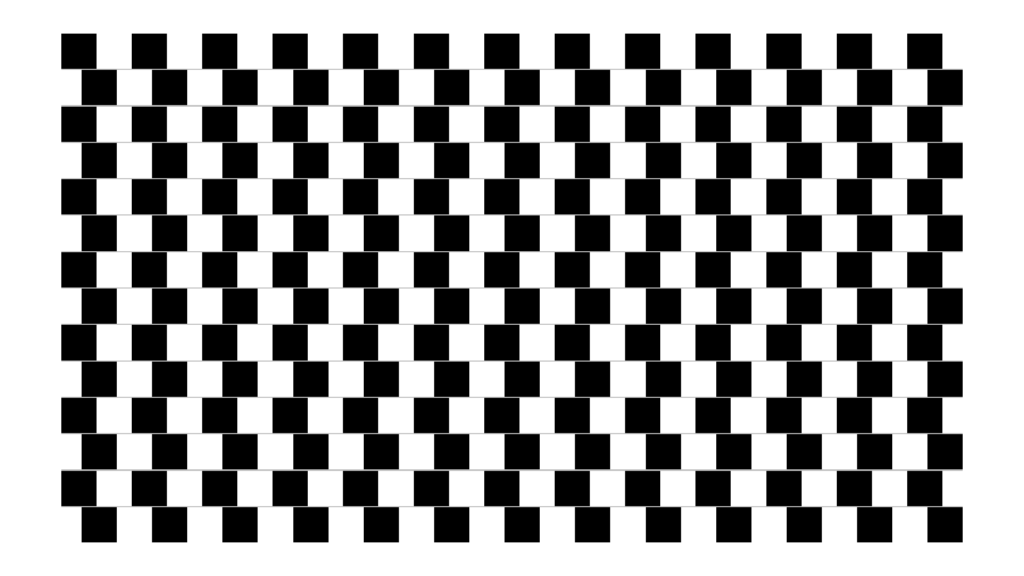
- Select “Shapes” -> “Basic Shapes” -> “Square/Rectangle” to create a rectangle. Drag the mouse to overlap the rectangle on the front of the “Grouped by 12” so that the size fits perfectly. (Follow the guide lines to adjust the size.)
- In the “Rectangle created in 13”, set “Fill” to “Gray” (you can create the “Münsterberg illusion” by setting “Black”), “Border” to “No border”, and “Sort objects” to “Move to the back”.
- Select all shapes and group them.
- From here, you can further reduce and duplicate the figure and superimpose some of it on a square of the same color to create a large Cafe Wall illusion figure with a smaller square.
File
The images and PowerPoint files I created are placed below. Please feel free to use them (within the terms of use).


Reference
Gregory, R. L. and Heard, P. (1979). Border locking and the Café Wall illusion. Perception, 8, 365-380.
https://journals.sagepub.com/doi/abs/10.1068/p080365?casa_token=7VHU_6tjD54AAAAA:zom074kkWBWdAa4WqrxKc010LvWu7D44XVZ2FE66SwUOkDcv6QvVPJCf77BNL_ewJI4CTEj5Kd7g
Münsterberg, H. (1897). Die verschobene Schachbrettfigur. Zeitschrift für Psychologie und Physiologie der Sinnesorgane, 15, 184-188.
https://echo.mpiwg-berlin.mpg.de/ECHOdocuView?url=/permanent/vlp/lit30214/index.meta&pn=1